Pummelvision takes a whole stack of your photos from the web, whether from Flickr, Facebook, Tumblr or a few others, and turns them into a frenetic vision of your life flashing before your eyes. This version is simply taking my 2000 most recent public photos but you can make it more tailored either by using individual Flickr sets, or Facebook tagged photos. It's interesting to see that it really highlights what my most frequent subjects are - flowers, landcapes, and food!
Sunday, January 09, 2011


Friday, December 03, 2010
London Glassworks Open Weekend
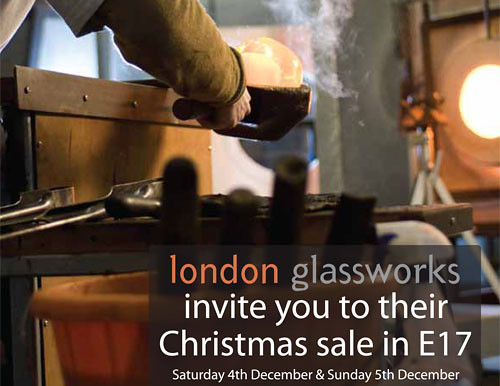
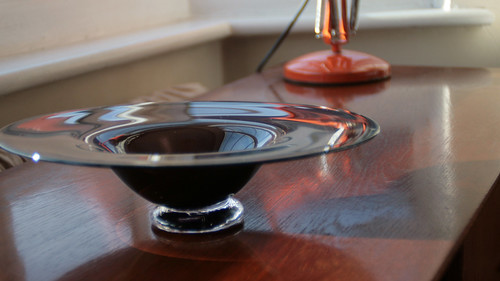
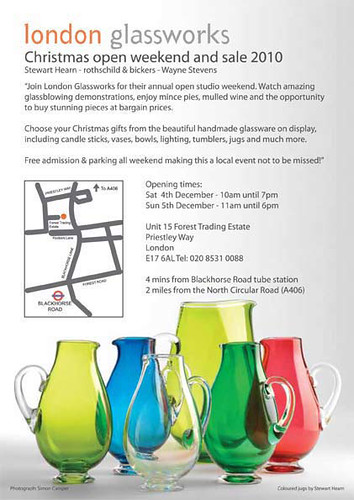
The fabulous London Glassworks are holding an open weekend from tomorrow so if you like glass, if you like handmade, and you like a bargain, make sure you check it out! This place is a little gem so I'm planning on getting down there and treating myself to something that looks nothing like my own wobbly efforts, and perhaps some lovely things for Christmas presents too if my budget will allow!
You can find them here, on an industrial estate near Black Horse Road station (Victoria Line & Overground).
Thursday, November 11, 2010
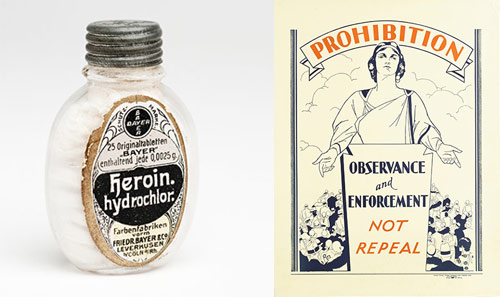
High Society
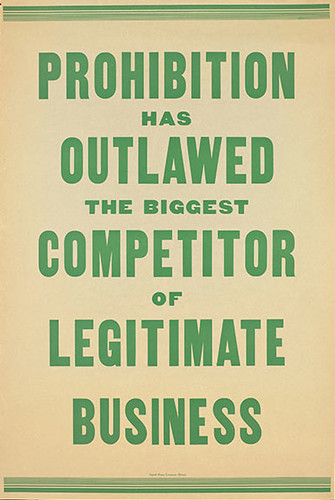
There's some lovely print to see, from fascinating little bottles of potions to somewhat modernist, positively Burrill-esque simplicity in the new High Society exhibition at the Wellcome Collection, if this Guardian gallery is anything to go by. It opens today and is on til the end of February.
Tuesday, November 09, 2010
Letterpress Calendar
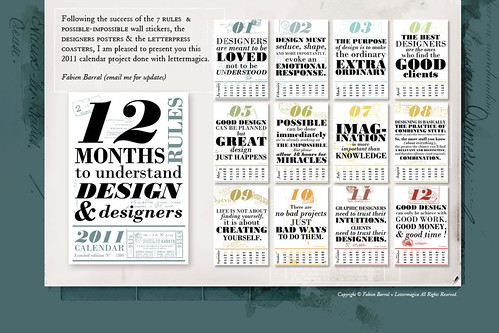
Check out this lovely typographic calendar from fabienbarral. Love the typeface and colours. I don't think it's available to buy yet but check letterpress-calendar.com for updates.
Sunday, October 31, 2010
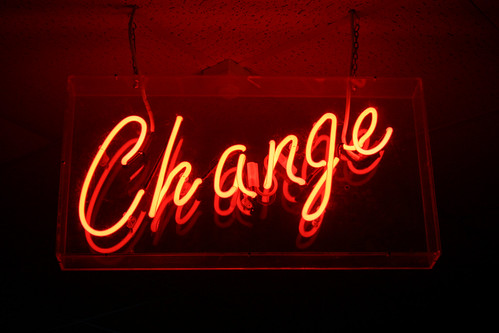
Pier Neon
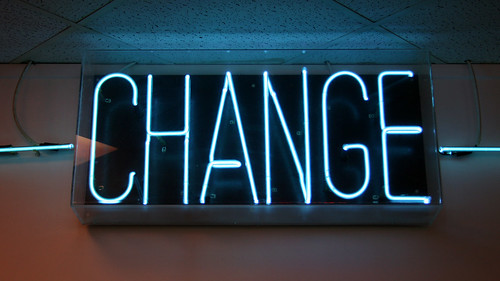
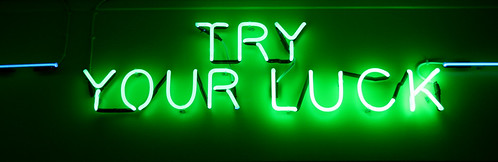
Lovely type turns up in the most unexpected places sometimes. These were all in the arcade at the bottom of Southwold Pier. The Pier has the infamous Under The Pier Show which is brilliant, but possibly means the lovely neon in the arcade gets even more overlooked than it would anyway. Looking at the photos now, feeling somewhat detached from their context, the decisively glowing phrases seem to take on an altogether more existential meaning.
Wednesday, October 27, 2010
Genius Debossing
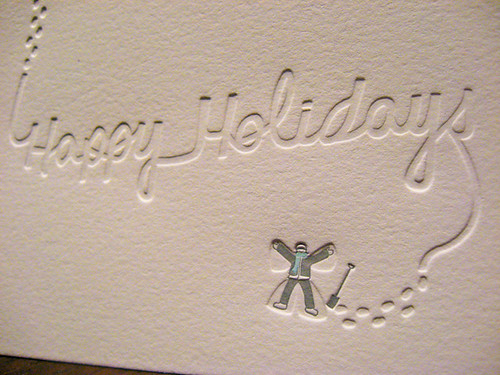
Spotted this fab card on Flickr today - that snow-angel deboss is brilliant. I wish I'd thought of it!
Sunday, August 29, 2010
Bookshopping
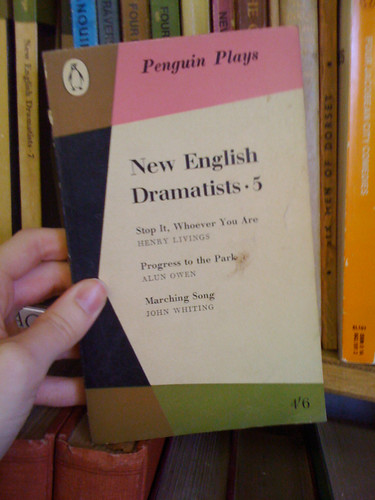
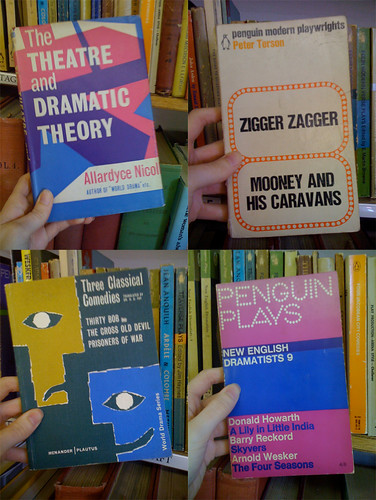
I found these fantastic book covers in a second hand bookshop in Lichfield - there were so many, but I think these were the choice picks. Lucky for me, Penguin Plays seem to be pretty unpopular in Lichfield.
Thursday, August 26, 2010
My Shared Items
Hi! Things have been a little quiet here recently, but no matter how busy I am I'm always reading, and sharing. You can see a stream of all of the things I think are interesting/lovely/funny/beautiful over in my Google Reader Shared Items. If you like the kind of things I post here, you might find those interesting too!
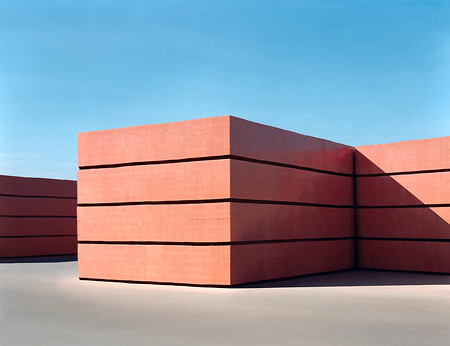
Among other things shared recently are Josef Schulz's stunning photography;
Daniel Freytag's gorgeous typography for Frey & Ford;
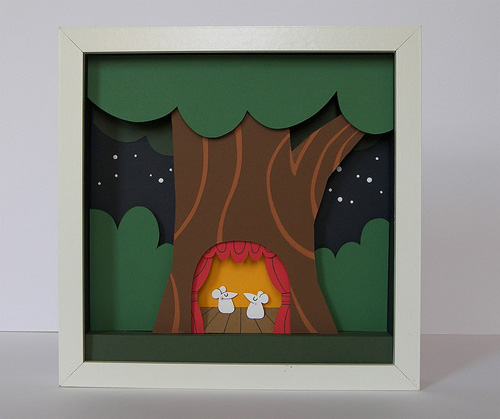
and Peter Slight's beautiful shadow boxes;
Among other things shared recently are Josef Schulz's stunning photography;
Daniel Freytag's gorgeous typography for Frey & Ford;
and Peter Slight's beautiful shadow boxes;
Tuesday, August 24, 2010
Blackberry, Blackcurrant & Cherry Gin.
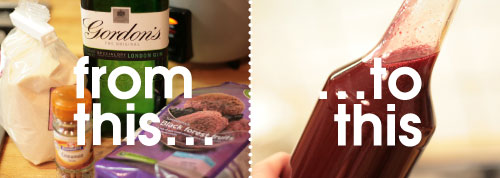
Make your own very delicious gin in a few easy steps.
It makes your kitchen smell brilliant too.
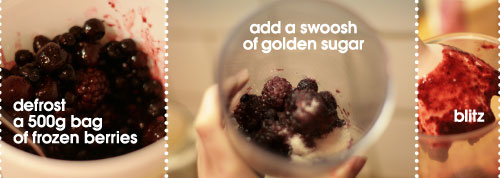
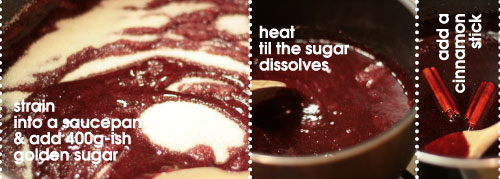

You might find, if your sieve is as rubbish as mine, that you need to strain it twice. After straining mine the second time, I also added a bit more gin - once it's cold you can just add to taste. A very yummy taste.
Wednesday, August 18, 2010
I Absolutely Must Have...
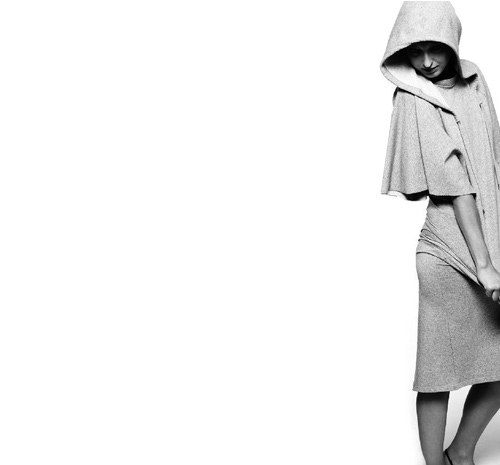
...this dress, from Anne Sophie Back. I love the hood, the sleeves, the material, the length, the photo....
Tuesday, August 10, 2010
Glassblowing
I was lucky enough to have a glassblowing lesson a few weeks ago and it was absolutely fantastic! I work for a creative company and we work with glass as a medium, but we are used to working with entirely different processes to the traditional hot glass techniques. It was such an exciting experience, I thoroughly recommend it - and if you find glass fascinating as a material anyway, it's pretty much a must! We went to London Glassblowing Courses based in Walthamstow, North London. Incredibly in one day (a fairly hot day, it has to be said!) we each came home with four complete pieces we'd made ourselves.
The first thing they get you to do is really more about convincing yourself not to run away from the furnace immediately (which your brain is insisting is what you really should be doing) and actually concentrate on moving an iron rod in through the little door of fear and gathering some molten glass from the huge ceramic pot-full inside, carrying it out and across the room, not dropping it on the floor, not touching it, and using your hand (with only damp newspaper to protect it) and a tool to shape it. The result is what they kindly term a 'snowman'. It could also be called a wobbly blob, a thingy, a doorless doorhandle, or a nipply thing, depending on how your mind works I guess.
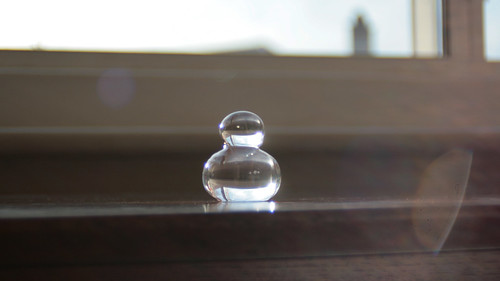
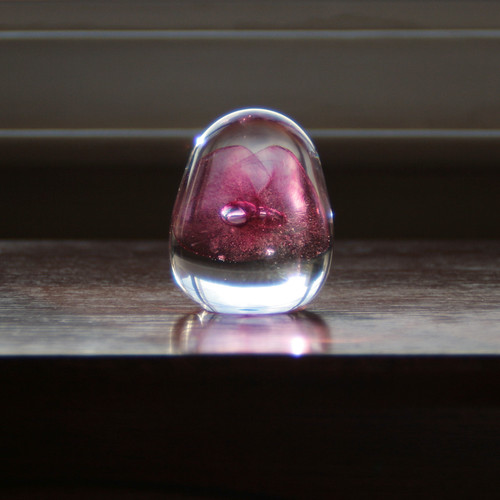
Next you progress to a traditional spherical paperweight, decorated with air bubbles and delicate floating petals of coloured glass inside. At this point, this looks like the pinnacle of glass design and utterly mystifying in it's production. They guided us through it really well though, starting with gathering some glass as you do for the snowman, then gathering another layer to build up the quantity. You then round the shape off again, before one of the instructors helps you add a soft, molten stringy bit of coloured glass onto either side, flattening it down to a blob. Then you do the fun bit - squishing a sharp tool into the centre of the coloured blob, now soft and maleable with a bit of resistance, like caramel. This makes the decorative petal shape and creates a space to trap the air bubbles when you then gather the last layer of glass, round that off and finish the piece.
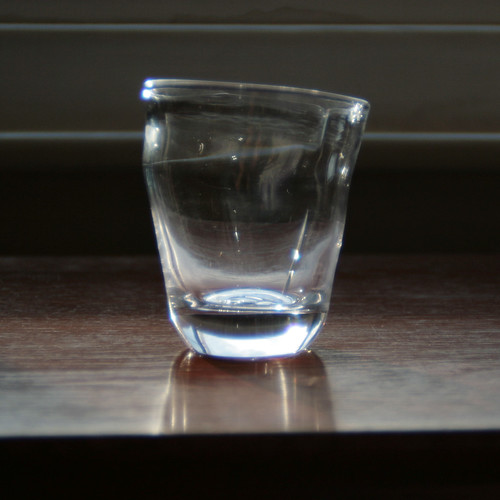
In the afternoon, the glassblowing begins. Task one is a tumbler or drinking glass. I will never look at one the same way: this is a real challenge. Just look at the mess I made;
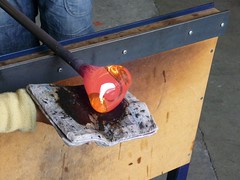
This time you need to get your skates on. Take too long getting between the furnace and your seat and the glass will be too hard to blow (sorry, couldn't think of any other way to say that...) But go too quick and your blob of glass goes all lopsided and you really can't blow a bubble into it until it's nice and balanced and shaped nicely - otherwise the finished piece will be thin on one side and all chunky on the other
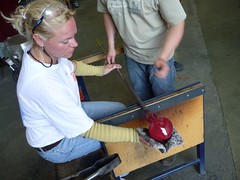
Although, describing the process as 'blowing a bubble' doesn't quite do it justice - think Pob-esque faces and ears popping. So now you have your glass, you've coaxed a bubble into it - first by re-heating the glass in the glory hole (yes it's really called that) and coaxing one-breath's worth of air into expanding for you, followed by more re-heating and more Pob-facing. Once you've got a decent-sized bubble, you shape it into a nicely spherical shape...
Lovely. Now, add another iron rod on the opposite end, and break the glass off the blowing rod. (Yes! "Break it off"! I know!!) I don't seem to have a photo of that bit - perhaps because it felt particularly nail-biting and I couldn't take my eyes off it every single time. So now you have your bubble attached to a rod, with one open end from where you broke it apart from the blowing rod. This is re-heated and you shape your tumbler into an elegant and delicate shape (*hahahahaha*)
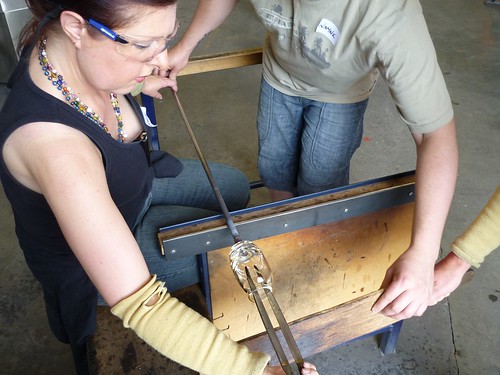
Corinne's actually looked great. Like a glass a normal person might even buy. Mine is the tumbler only a mother could love. It even has a half-resealed crack up one side, where I broke it away from the blowing rod a little too enthusiastically.
And finally, the pièce de résistance - a glass dish (some beautiful examples of which - like these by ,Stewart Hearn - we had been admiring in their small gallery upstairs). We stuck to one colour - which was complicated enough to add, so they did that bit for us; I think the really saturated coloured glass rods that are divided up to add to the clear in small quantities are particularly expensive. It started off much like the tumbler, except bigger of course, and with an exciting addition of a glass foot, for which you need a few pairs of eyes;
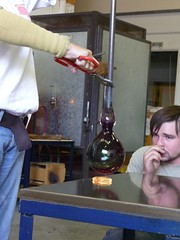
BUT! One of THE most exciting parts of the day, I have to say, was the amazing way the dish took shape. From when you get to the stage of what is essentially a big wobbly tumbler on a stick, you then take the whole thing and stick it back into the glory hole. Utterly insane. I know. But THEN!!!! It goes a bit soft and saggy. You can see it melting, and when it almost falls in on itself.... you SPIN!
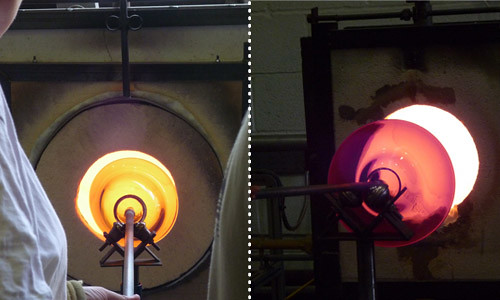
...(and then you make sure you can still get it out through the hole) and then you SPIN SPIN SPIN LOADS MORE! It really is that exciting!!!!
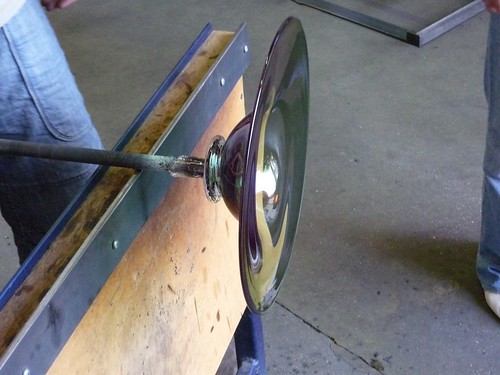
And if you wanted a dish with scalloped edges, at this point you just turn the whole thing down towards the floor, and there you go, gravity is your friend.
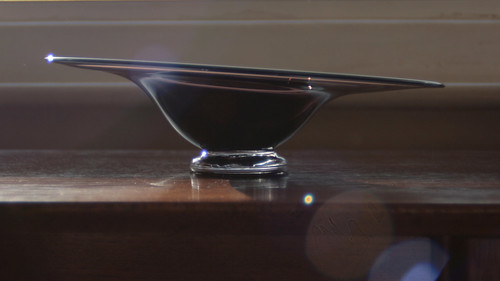
I kind of like the jaunty asymetric quality mine has...
You can contact the guys we did it with at glassblowingcourses.co.uk.
The first thing they get you to do is really more about convincing yourself not to run away from the furnace immediately (which your brain is insisting is what you really should be doing) and actually concentrate on moving an iron rod in through the little door of fear and gathering some molten glass from the huge ceramic pot-full inside, carrying it out and across the room, not dropping it on the floor, not touching it, and using your hand (with only damp newspaper to protect it) and a tool to shape it. The result is what they kindly term a 'snowman'. It could also be called a wobbly blob, a thingy, a doorless doorhandle, or a nipply thing, depending on how your mind works I guess.
Next you progress to a traditional spherical paperweight, decorated with air bubbles and delicate floating petals of coloured glass inside. At this point, this looks like the pinnacle of glass design and utterly mystifying in it's production. They guided us through it really well though, starting with gathering some glass as you do for the snowman, then gathering another layer to build up the quantity. You then round the shape off again, before one of the instructors helps you add a soft, molten stringy bit of coloured glass onto either side, flattening it down to a blob. Then you do the fun bit - squishing a sharp tool into the centre of the coloured blob, now soft and maleable with a bit of resistance, like caramel. This makes the decorative petal shape and creates a space to trap the air bubbles when you then gather the last layer of glass, round that off and finish the piece.
In the afternoon, the glassblowing begins. Task one is a tumbler or drinking glass. I will never look at one the same way: this is a real challenge. Just look at the mess I made;
This time you need to get your skates on. Take too long getting between the furnace and your seat and the glass will be too hard to blow (sorry, couldn't think of any other way to say that...) But go too quick and your blob of glass goes all lopsided and you really can't blow a bubble into it until it's nice and balanced and shaped nicely - otherwise the finished piece will be thin on one side and all chunky on the other
Although, describing the process as 'blowing a bubble' doesn't quite do it justice - think Pob-esque faces and ears popping. So now you have your glass, you've coaxed a bubble into it - first by re-heating the glass in the glory hole (yes it's really called that) and coaxing one-breath's worth of air into expanding for you, followed by more re-heating and more Pob-facing. Once you've got a decent-sized bubble, you shape it into a nicely spherical shape...
Lovely. Now, add another iron rod on the opposite end, and break the glass off the blowing rod. (Yes! "Break it off"! I know!!) I don't seem to have a photo of that bit - perhaps because it felt particularly nail-biting and I couldn't take my eyes off it every single time. So now you have your bubble attached to a rod, with one open end from where you broke it apart from the blowing rod. This is re-heated and you shape your tumbler into an elegant and delicate shape (*hahahahaha*)
Corinne's actually looked great. Like a glass a normal person might even buy. Mine is the tumbler only a mother could love. It even has a half-resealed crack up one side, where I broke it away from the blowing rod a little too enthusiastically.
And finally, the pièce de résistance - a glass dish (some beautiful examples of which - like these by ,Stewart Hearn - we had been admiring in their small gallery upstairs). We stuck to one colour - which was complicated enough to add, so they did that bit for us; I think the really saturated coloured glass rods that are divided up to add to the clear in small quantities are particularly expensive. It started off much like the tumbler, except bigger of course, and with an exciting addition of a glass foot, for which you need a few pairs of eyes;
BUT! One of THE most exciting parts of the day, I have to say, was the amazing way the dish took shape. From when you get to the stage of what is essentially a big wobbly tumbler on a stick, you then take the whole thing and stick it back into the glory hole. Utterly insane. I know. But THEN!!!! It goes a bit soft and saggy. You can see it melting, and when it almost falls in on itself.... you SPIN!
...(and then you make sure you can still get it out through the hole) and then you SPIN SPIN SPIN LOADS MORE! It really is that exciting!!!!
And if you wanted a dish with scalloped edges, at this point you just turn the whole thing down towards the floor, and there you go, gravity is your friend.
I kind of like the jaunty asymetric quality mine has...
You can contact the guys we did it with at glassblowingcourses.co.uk.
Friday, August 06, 2010

Subscribe to:
Posts (Atom)


